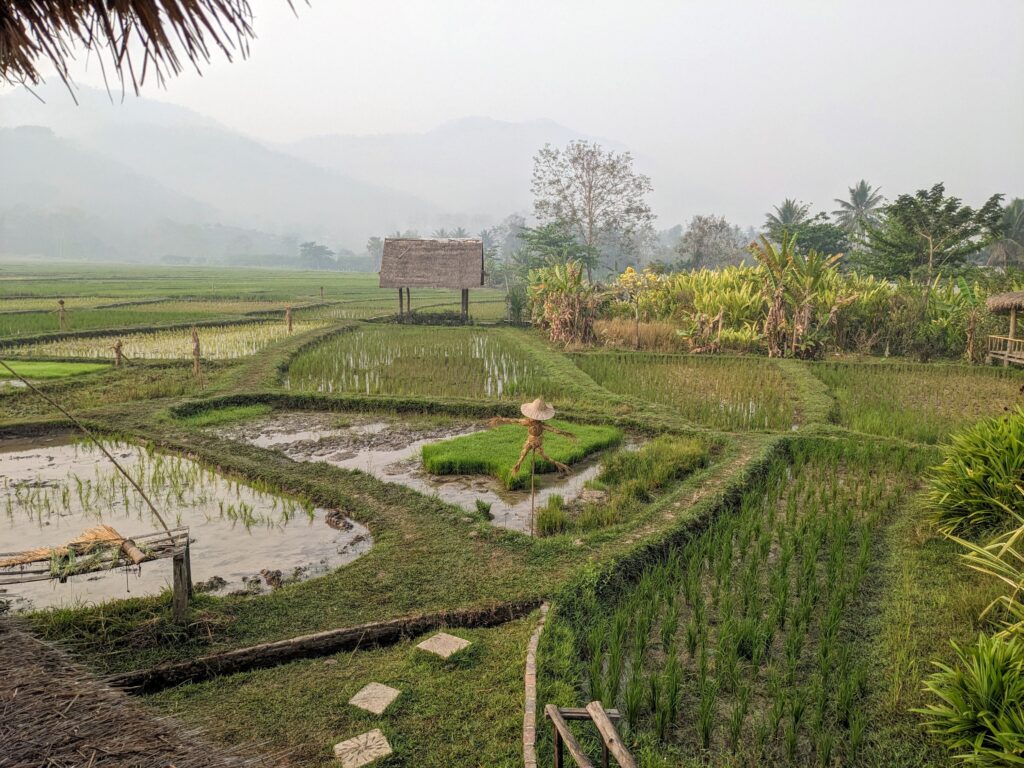
Last week, we spent the morning at a farm just outside Luang Prabang to take part in the intriguingly-named ‘Rice Experience’, where we would learn more about what it takes to produce one of the world’s most important staple foods†. We’d read beforehand that children loved it, and true to form, I was extremely excited about splashing around in some mud and meeting the water buffalo.
Step 1: Select the grains
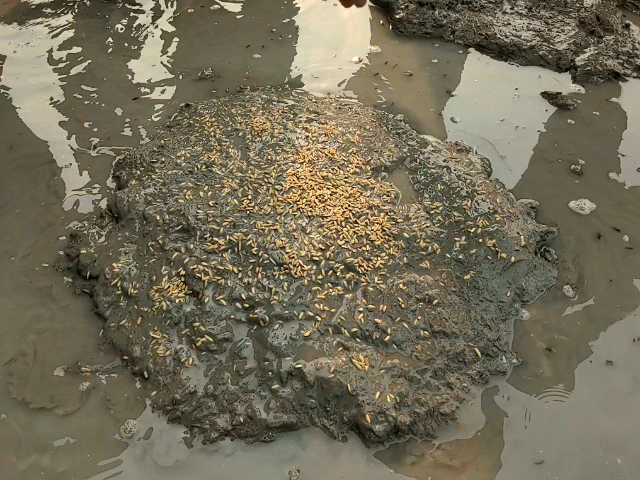
Our guide Neuk showed us how to select the most suitable grain for planting by putting a freshly-laid egg into a bowl of water and showing us that it sank. Next, he added lots of salt (to increase the density of the water) until the egg began to float, then removed the egg and added handfuls of rice. The rice grains that sank in the salty water were suitable for planting, as their weight suggested that they were healthy grains and not damaged or empty husks.
Typically, 35 kg of grain is required to plant a hectare of rice, so it is well worth selecting the grains that have the best possible chance of producing a good crop. Ultimately, this will yield around 1,500 kg of rice (roughly a 40-fold increase!).
Step 2: Germinate the seed
Now it was time for us to get involved. Neuk casually stepped barefoot down from the path into the rice paddy and invited us to follow him. He made it look very easy to walk around but it really wasn’t – somewhere between wading in soup and ice skating! Thankfully at this point he hadn’t mentioned the snakes, spiders and rats who also live in the rice paddies (and who end up on locals’ BBQs for dinner if they are harming the crop). For some reason it hadn’t crossed my mind that we might be sharing the area with any friends, so I happily got stuck in.
Neuk gathered some mud together to make a mini-mountain that protruded above the water level, and we sprinkled the grain on here.
He splashed the grain with water and explained that it would take between three and four days to germinate. We didn’t have this long to wait, so in a perfect Blue Peter moment, he produced some seedlings he had prepared earlier that we could use for the next steps in the process.
Step 3: Plough the rice paddy
I was quite surprised to find that a flooded rice paddy needed ploughing, but apparently it does and this happens in several stages: first, the earth is loosened and turned over so that any weeds are buried, and then a rake-like plough (which probably has a special name…) is used to even out the ground ready for planting. For this job, we met Susan, a gentle giant of a water buffalo who lived on the farm with her partner Bentley and her three-month old baby. We thought Susan was an excellent name for a water buffalo, although the little we know about farming from friends tells me that it is not the done thing to name your cattle, so she had almost certainly been named for our benefit!
We were taught the Lao commands to ask Susan to start and stop, and I had a go at driving the plough. Even though Susan was doing all the hard work, it still took my full attention to keep up with her while sloshing through the knee-deep mud. I did my best with the commands, but Susan made it very clear that she didn’t understand my accent.


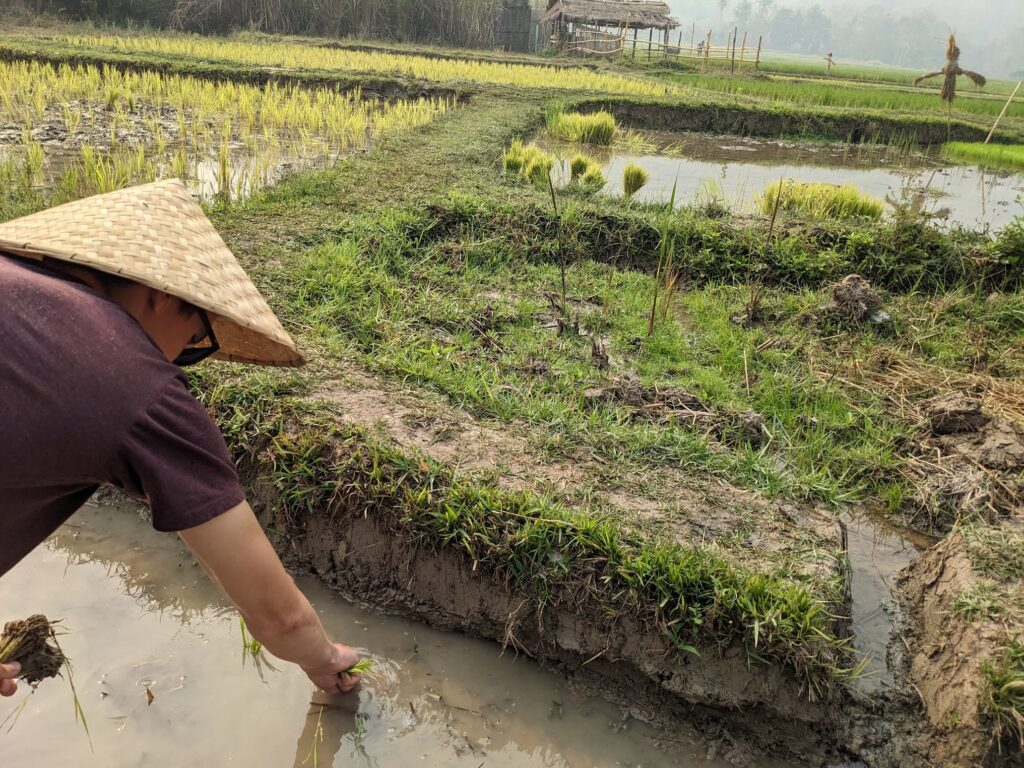
Step 4: Plant out
Now that the paddy was ready for planting, we were shown how to stand in a row facing the side of the paddy, divide our seedlings and pop them into the soil, then take a step backwards and repeat. It was not at all easy to walk backwards through the thick mud without falling! By this point, I had wiped my muddy hands all over my shorts so was in a complete mess, but I still wasn’t quite ready to embrace the prospect of getting entirely submerged in the mud.
Neuk showed us how to control the amount of water flowing into each rice terrace by using a thick clod of mud. This is stuffed into the irrigation channel to block it or lifted out to let the water flow into the lower terraces. It was simple but remarkably effective! This method is needed because they sometimes allow fields to dry out completely in order to force the rice plants to grow stronger and deeper roots.
Step 5: Harvest
In Northern Laos, rice farmers are able to produce two harvests per year. From planting to harvest takes around two months during the dry season and more like five-six months during the wet season. Either way, once the plants turn yellow, this is a sign that they are ready to be harvested.
We were shown how to grab a plant, face the scythe away from our bodies, and cut rapidly through the stems. We then used one of the stems like a ribbon to tie the other stems together and perched this little bouquet on top of the stalks still protruding from the rice paddy. It is then left here in the sun for a week to dry out.


Step 6: Thresh and winnow
Now we had our rice crop, it was time to leave the fields (and attempt to clean our feet, although to be honest, that’s been an ongoing project over the last few days…) We learnt how to separate the grains from the rest of the plant by bashing them repeatedly on a wooden block. I didn’t try this bit, but it was clear from our group’s attempts that it wasn’t as easy as it looked!

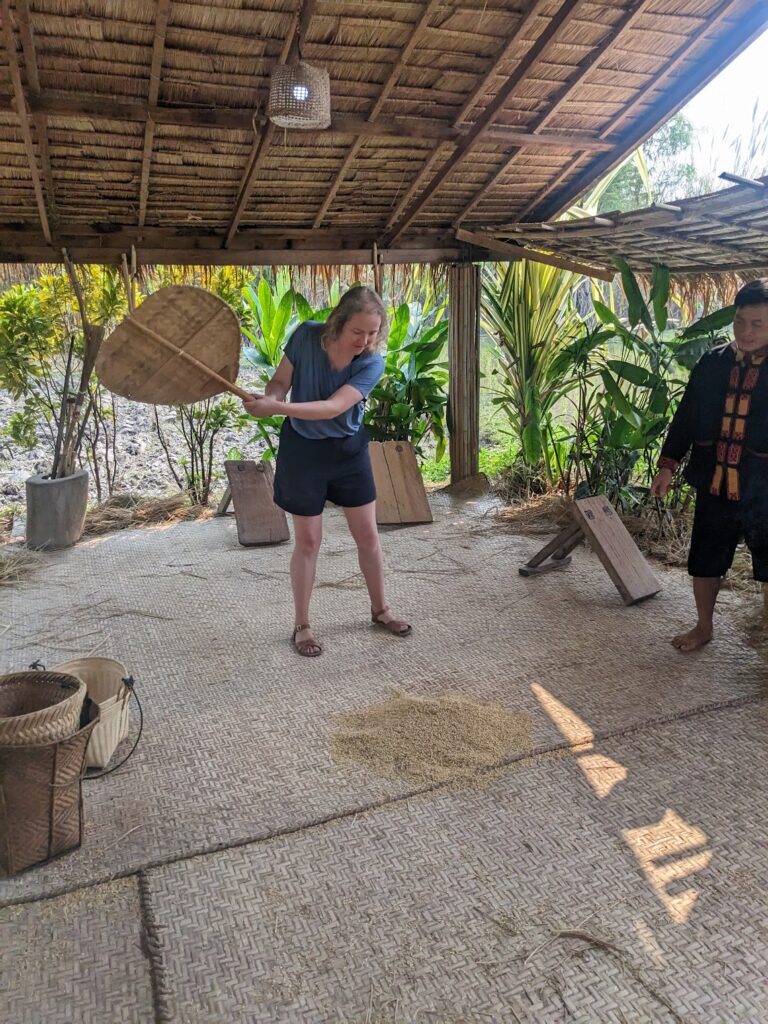
Once the threshing stage was completed, this left a pile of grain, mixed in with chaff, leaves, and other bits and bobs that needed separating using a fan. Did you know this was called winnowing? I’ve just learnt this word while writing this post and I’m very pleased with it!
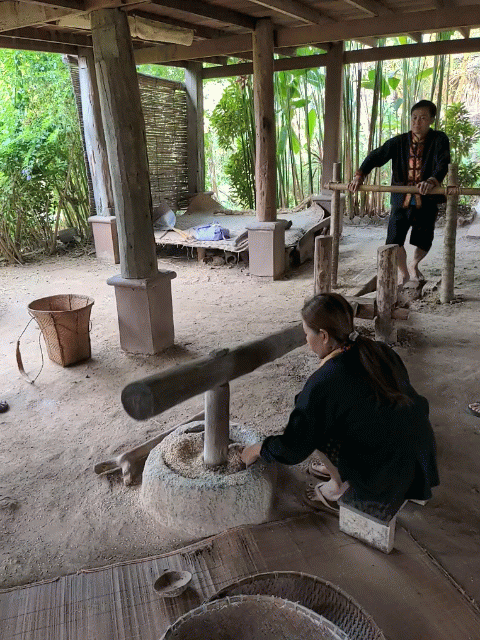
Step 7: Husk
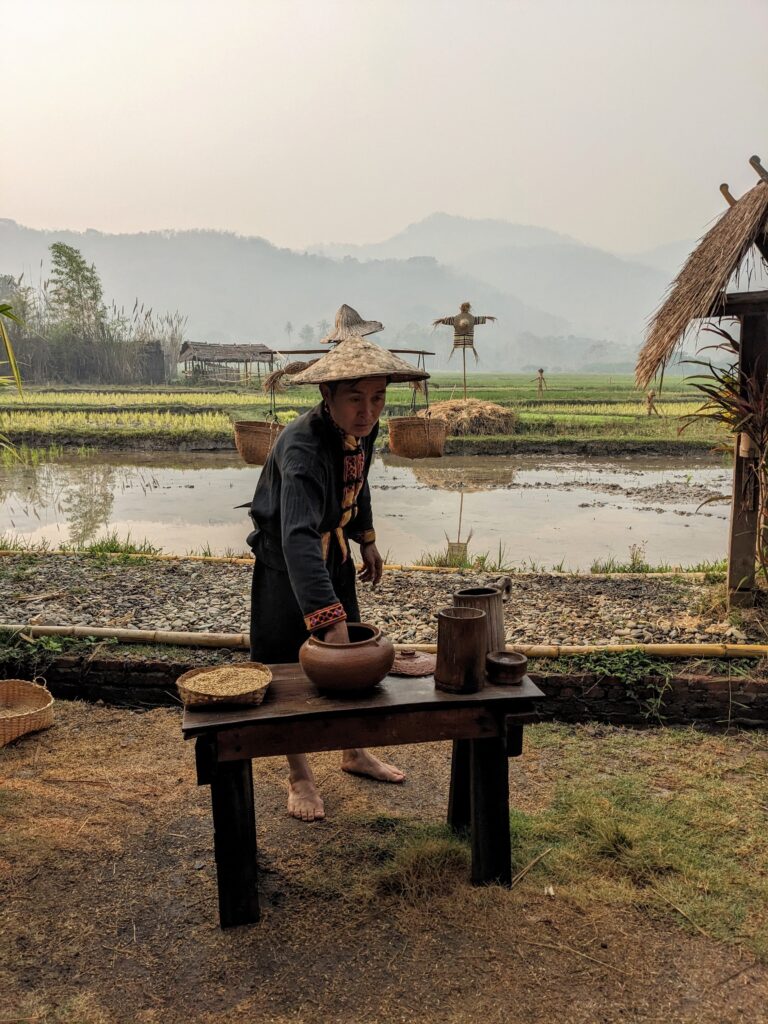
The next stage was to remove the rice grain from its husk. Apparently there are strict gender roles at play here – men or boys do the stamping part and women do the mixing part, never the other way around. Typically, boys will get up around 4 or 5am and do an hour of husking before school. Quite the morning work out!
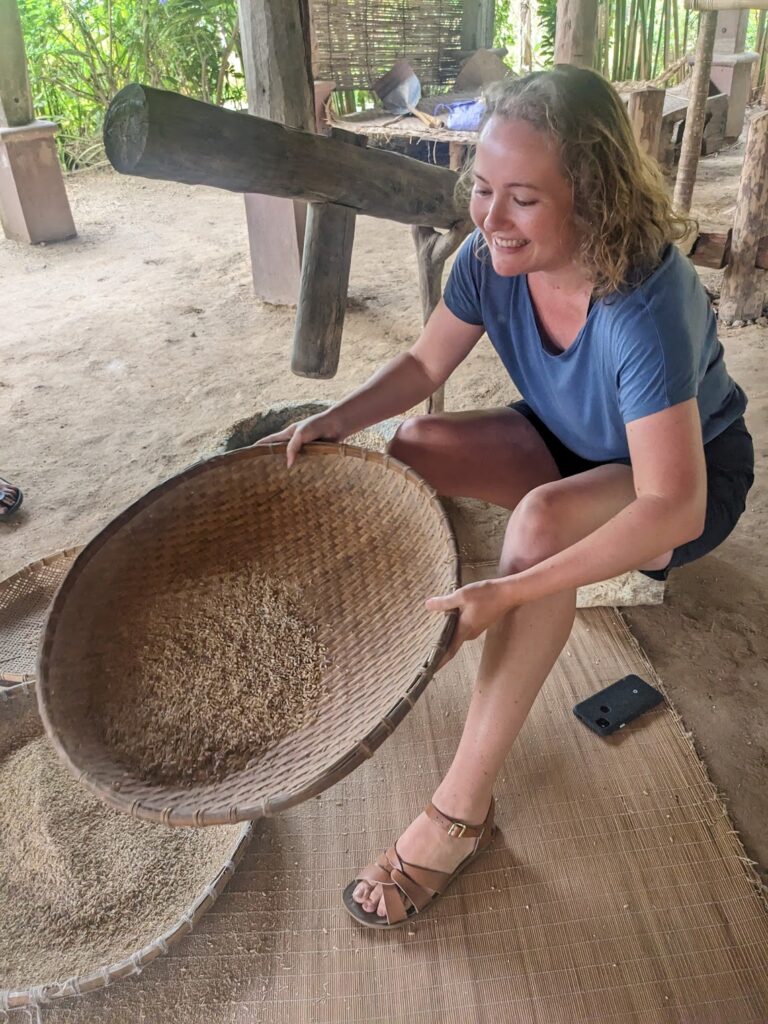
This stage leaves a big bowl of rice grains mixed in with the husks, and to separate the two involves putting them into a round tray and sieving them with an action similar to cooking in a wok. I’m not sure I quite had the knack, but I was much better at it than some of our group! Any waste from this stage is used as chicken or pig feed or can be used to produce rice wine.
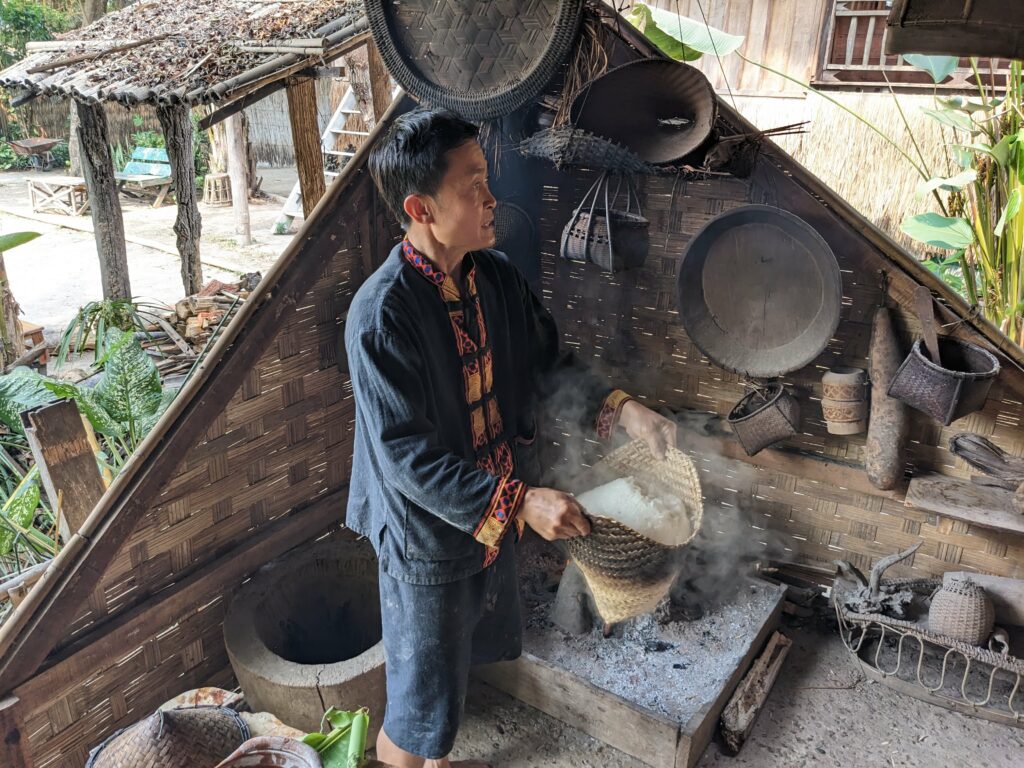
Step 9: Soak and steam
In Laos, sticky rice is an important component of every meal. For breakfast, the rice is soaked overnight and then steamed in the morning for 20-30 minutes, turned over and steamed for a further 10 minutes. It’s seriously sticky stuff, so turning it over is much more like flipping a pancake than stirring a pot. After steaming, it is spread out on a large tray, which helps it to cool down and dry out a bit.
Step 10: Serve and eat!
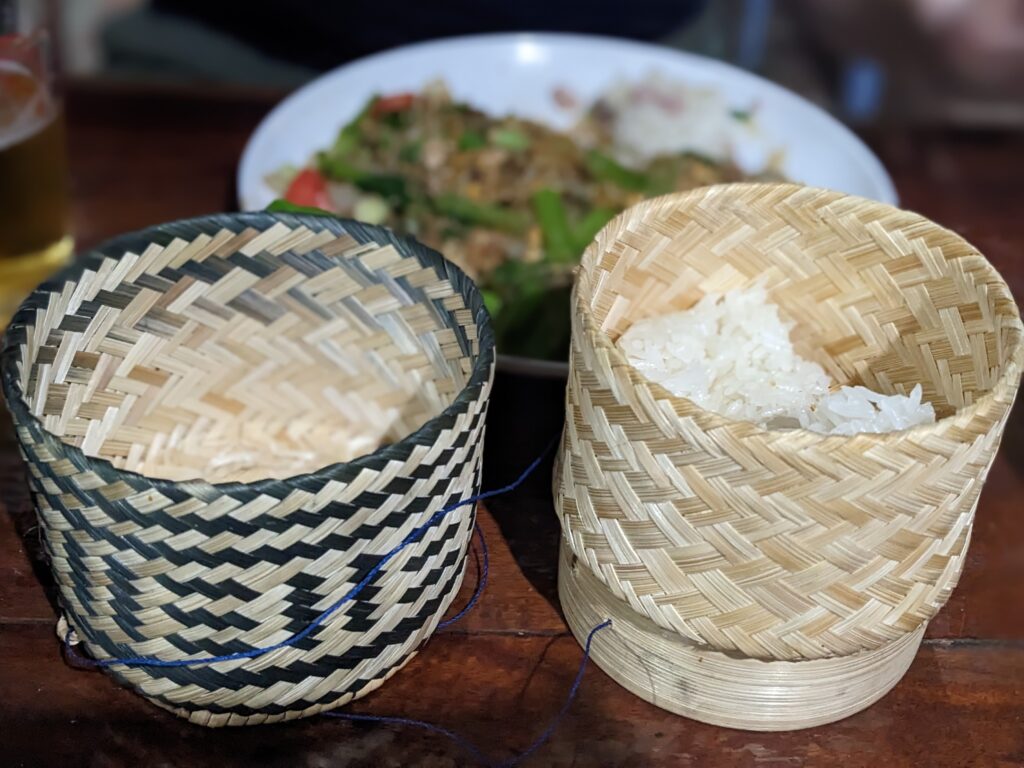
Finally, it’s time to eat. Sticky rice is always served in a kong khao dok, a bamboo rice basket. I had assumed until this point that these baskets were also used to steam the rice, but I now realise that Laotians eat far too much sticky rice to mess around with steaming dainty little portions individually! Anyway, the baskets look really pretty but also keep the rice warm throughout the meal, which is important because in Lao cuisine, every bite should be eaten alongside a handful or spoonful of rice.
I love rice (like, really love it!) but I’m ashamed to say that other than admiring pretty terraces from afar, I didn’t really have any idea how it grew, what the plants looked like or quite how we ended up with rice from them. Even though some of the steps we learnt are the ‘ancient’ way of doing things and some farmers now have machines to replace steps in the process, it was still a really fascinating crash course and a gloriously muddy morning!